

Beautiful tile can hide a lot, but only for a while. In a bathroom, where water, steam and daily use never let up, tile lasts when the layers beneath it are right. If you’re planning bathroom tile installation in Houston, this guide walks through the project the way a good installer builds it: from the surface underneath to the finishing touches you see.
Mr. Nguyen: 346-900-4000
Layer One: The Surface Underneath
Every tile job starts with whatever sits below it, and this is where many failures begin.
For floors, the subfloor must be flat, solid and free of movement. Even small dips can cause tile to crack or sit unevenly, especially with large-format pieces. Houston adds its own challenge: our clay soils swell and shrink with weather, and that can shift a slab foundation slightly over time. An uncoupling membrane between the floor and the tile helps absorb minor movement and reduces the risk of cracks.
For walls, standard drywall isn’t suitable in wet areas. Cement board or a similar tile-ready backer, properly fastened and sealed at the seams, gives tile a stable and moisture-resistant base.
Layer Two: Waterproofing Where It Counts
Inside the shower, and often across the whole bathroom floor, a waterproof membrane stops moisture from reaching the structure. Tile and grout are water-resistant, not waterproof, so the membrane does the real protecting. Corners, valve openings, benches and floor-to-wall joints deserve extra attention, because that’s where leaks tend to start.
Mr. Nguyen: 346-900-4000

Layer Three: Choosing the Tile
The right tile depends on where it goes.
Porcelain. Dense, very low in water absorption and tough, porcelain is the most dependable choice for floors and showers. It also comes in convincing wood, stone and concrete looks.
Ceramic. Lighter and often more affordable, ceramic works well on walls and in lower-traffic areas.
Natural stone. Marble, travertine and slate bring one-of-a-kind character, but they need sealing, regular care and a closer look at slip resistance and staining.
Mosaics. Small tiles conform to curved or sloped surfaces, which makes them a natural fit for shower floors, and the extra grout lines add traction.
When choosing floor tile, check the slip-resistance rating (often listed as DCOF). A glossy surface that looks great in a showroom can be slick when wet
Layer Four: Layout and Setting
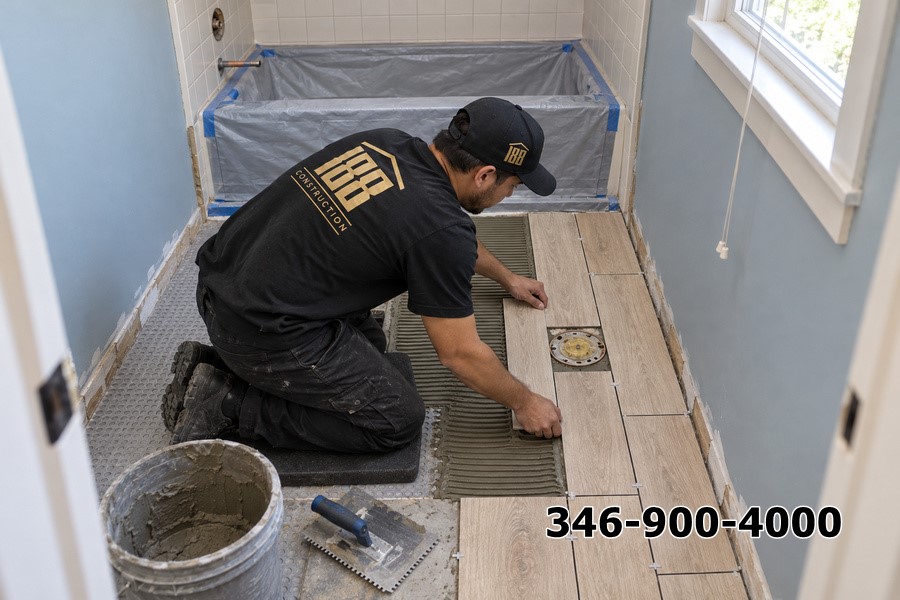
Layout is the quiet skill that separates a professional job. Before any tile is stuck down, a good installer plans where cuts will fall so the pattern looks balanced, avoids thin slivers at corners and doorways, and lines up grout joints with fixtures and niches.
Setting matters just as much. Tile needs the right adhesive for its size and material, applied with enough coverage that there are no hollow spots underneath. Large-format tile in particular needs a flatter surface and the correct trowel and technique. Hollow spots are a common cause of cracked or loose tiles years later.
Mr. Nguyen: 346-900-4000

Layer Five: Grout, Joints and Sealing
Grout fills the gaps and finishes the look, but it also has jobs to do.
- Cement-based grout is common and affordable, and it needs sealing in wet areas.
- Epoxy grout resists stains and moisture better and suits showers and heavy-use bathrooms.
- Flexible caulk should be used, instead of grout, at inside corners and where the tile meets the tub, shower base or countertop. These joints move slightly, and rigid grout cracks there.
Natural stone and some grout types need sealing after installation to protect against stains and moisture.
Where Tile Goes in a Bathroom
- Floors: durable, slip-resistant tile, with underfloor heating as an option for comfort
- Shower walls: floor-to-ceiling tile, with large formats for fewer grout lines
- Tub surrounds: tile that coordinates with the rest of the room
- Accent walls and niches: a place for pattern, color or texture without committing the whole room
- Backsplash behind the vanity: protects the wall from splashes
Mr. Nguyen: 346-900-4000
What Drives the Price
Tile projects vary a lot. The biggest influences are the tile itself, how much surface is covered, the complexity of the pattern (herringbone or diagonal layouts take longer), how much prep or demolition is needed, whether waterproofing or heating is included, and any repairs uncovered once old tile comes off. An itemized estimate makes these differences clear.
Why Prep Time Is Worth Paying For
Rushing the layers beneath the tile saves a little time up front and costs a lot later. Cracked tile, loose pieces and discolored grout usually point back to a surface that wasn’t flat, a bond that wasn’t complete or a joint that wasn’t flexible. Doing it properly means longer on-site time at the start and fewer problems for years afterward.
Part of a Bigger Project
Tile often works best when planned alongside everything else in the room. If you’re also thinking about a new vanity, shower or lighting, a full Bathroom Remodeling plan lets the layout, plumbing and finishes work together rather than being retrofitted piece by piece.
Tile Work by 188 CONSTRUCTION
188 CONSTRUCTION installs bathroom tile for Houston homeowners, covering floors, showers, tub surrounds and accent walls. Our team includes engineers with Master’s degrees, and we are licensed and insured, so surfaces, waterproofing and structure are planned correctly and your project is protected. We take the time to prepare surfaces, lay out patterns carefully and finish joints properly, so the tile looks right and stays right.
Ready to update your bathroom with tile that’s built to last? Ask Mr. Nguyễn for an estimate at 346 900 4000.